Last summer, our team made the courageous leap from Basecamp to JIRA. We heard a lot about JIRA and were optimistic. JIRA was reputed to be a more highly-evolved issue tracking system embraced by agile software development teams. We took the plunge! It took several months to bend JIRA to our will, but now I think we can say it was all worth it.
What is JIRA?
JIRA is an Atlassian software product for issue tracking and project management. The software allows users to create tasks within projects and manage those tasks through a customized workflow.
JIRA provides a host of options for viewing and reporting on the status of issues including project boards, dashboards, and reports. Users are added to projects under a role (Admin, Client, etc.) with a specified set of permissions.
The software facilitates collaboration by sending email notifications to specified watchers whenever an issue is updated. You can @mention someone in a comment and they will receive notification by email, even if they are not a watcher.
The Beginning
Our first few weeks with JIRA were challenging. As with many sophisticated tools, there was much to learn before we could use it effectively. One of JIRA’s strengths is the ability to customize most things, and a lot of fine tuning had to happen before we had a tool that was in line with our needs. The user interface is not entirely consistent, which made for a steeper learning curve.
We are using a cloud version of JIRA with a few added plugins. Tempo Timesheets is an add-on module for time-tracking and reporting. Reporting is available at the account, project, team and user levels, which makes it invaluable for managing projects and client billing. Issue Checklist is another plugin that allows us to add checklist items to any issue.
Making It Our Own
Once the installation and configuration were completed, our next tasks were setting up projects, workflows and project boards. We initially set up new projects to follow scrum development, but later switched to Kanban for improved flexibility.
As a web firm that responds to ad hoc client requests, we quickly discovered that we could not predictably sequester resources to meet a set sprint. Once we set up a base project with a base workflow, we apply that shared configuration to new projects, making the process of setting up new projects a snap.
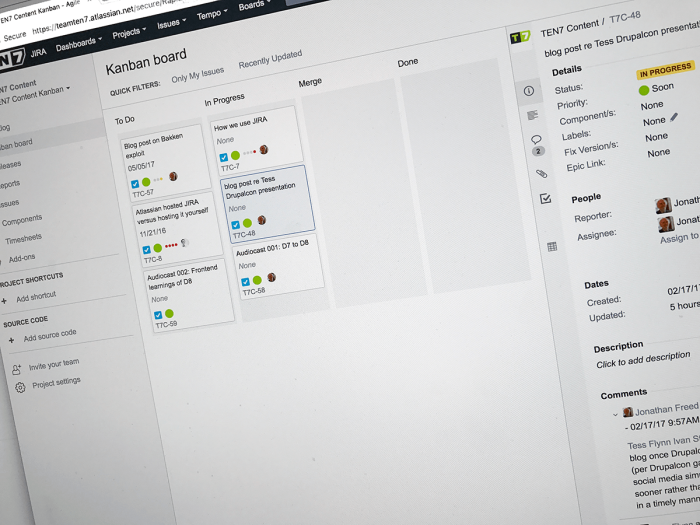
Project boards provide a visual overview of all active tasks and their progression through the workflow. Setting up the configuration of our boards has required ongoing tweaks, but we’ve settled on columns that divide items into:
- To Do
- In Progress
- Internal Review
- Client Review
- Merge
- Done
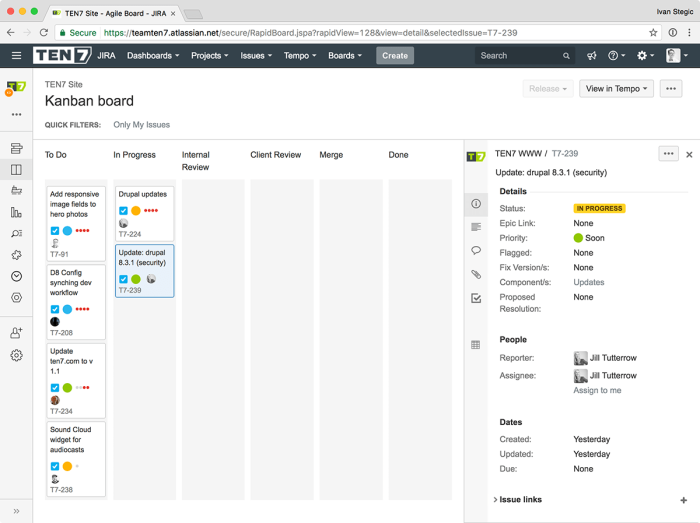
Merge is for items with code that are ready to be merged into the repo. Done shows all released and closed items. For projects with crowded boards, we might create swim lanes by priority or project sections.
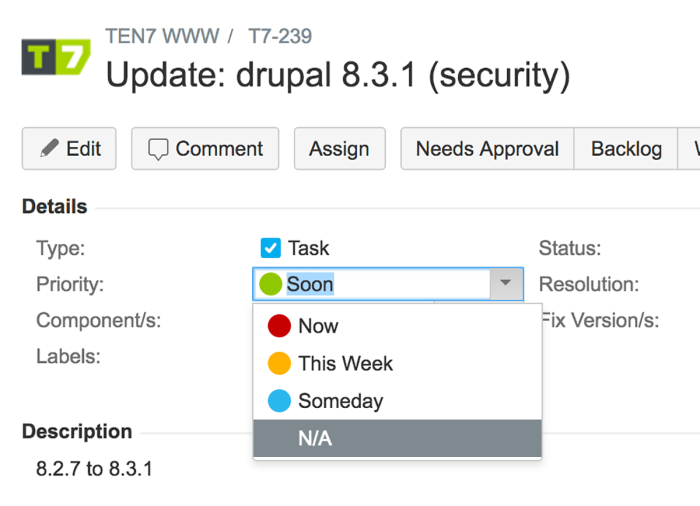
Part of the task of taming JIRA is simplifying features. Setting the Priority levels for tasks is an example of this. Through an iterative process with lots of discussion, we finally established a system that has meaning for our team as well as our clients. Priority red corresponds to a rating of “Now”, yellow means “This Week”. We have green for “Soon” and soothing blue for “Someday”.
What JIRA Does Well
As a project manager, I appreciate all the ways I can view the status of issues. At first it was dizzying, but now there are three main ways I keep up with projects: project boards, our team board and custom dashboards.
Project boards provide a quick overview of all active tasks at each stage of completion. We set these up per project. The team board is what we use daily at our standups. We set this board up with tabs for each team member, plus one for unassigned items. It allows the project manager to review each person’s workload. The unassigned view tracks items ready for assignment. Because project boards are so visual, I use them in client check-in meetings.
Dashboards are collections of widgets. I set these up to help me manage across all our projects. I have widgets for tracking hours logged to specific projects, that track items that need approval and items that are due soon. Another useful widget finds new tickets that need to be reviewed before being released to the team or added to backlog.
Time tracking is another powerful feature of JIRA. Tempo timer is a quick way to track time directly to a specific ticket in JIRA. Tempo worklog allows you to enter and edit your daily work log. Tempo timesheets has a powerful reporting interface with the ability to print, save as a PDF, or export to Excel. Providing monthly detailed billing reports to clients has never been easier!
Happy Endings
There are more features and configuration choices than I can squeeze into one article. Hopefully this post gives you a sense of what to expect on your JIRA journey. In future related posts you’ll read about the induction to the world of JIRA from a developer perspective, and our investigation into server vs. cloud installations.
JIRA is a big landscape to cover, and I discover useful features to explore all the time. The first three months on JIRA were disconcerting, as we were making changes to the configuration on a daily basis. That gradually slowed down. Now we have a robust, custom tool that our whole team and our clients use on a daily basis.